Windows supports two types of bitmap: device-independent (DIB) and device-dependent(DDB). A device-independent bitmap is an external format, which allows bitmaps to be moved from one device to another. Device-dependent bitmaps are designed and optimised for use with a specific device (device-dependent) and hence are unsuitable for use in an environment for which they were not created. A typical example would be a bitmap created for video memory optimised for displaying screen output.
Creating and Loading Device-Independent Bitmaps
Device-independent bitmaps are typically created using an image editor. To load a bitmap for use in an application use the LoadImage() function. This supersedes the LoadBitmap() function. The prototype for this function is
HANDLE LoadImage(HINSTANCE hInst, LPCSTR name, UINT type, int cx, int cy, UINT fuLoad);
Where
hInst – is a handle to the module of either a DLL or executable (.exe) that contains the image to be loaded.
name – the image to be loaded.
UINT – The type of image to be loaded.
cx – The width, in pixels, of the icon or cursor.
cy– The height, in pixels, of the icon or cursor.
fuLoad – can be one of the following values: LR_CREATEDIBSECTION; LR_DEFAULTCOLOR;LR_DEFAULTSIZE; LR_LOADFROMFILE; LR_LOADMAP3DCOLORS; LR_LOADTRANSPARENT; LR_MONOCHROME; LR_SHARED; LR_VGACOLOR
If the function succeeds, the return value is the handle of the newly loaded image. If the function fails, the return value is NULL.
For further reading
https://docs.microsoft.com/en-us/windows/win32/api/winuser/nf-winuser-loadimagea
To convert a DIB to a DDB, use the API function CreateDIBitmap.
https://docs.microsoft.com/en-us/windows/win32/api/wingdi/nf-wingdi-createdibitmap
Displaying Bitmaps
To display a bitmap, two device contexts must be declared: one will hold the current device context while the other will create a second copy device context that will be used to store the bitmap until it is ready to be drawn in the window. This copy device context is created using a call to API function CreatCompatibleDC(). A newly created or existing bitmap can then be selected into the copy device context using the SelectObject() API function and finally copied to the screen using the BitBlt() API function. The sequence of events is as follows –
DC=GetDC(hwnd);
memDC=CreateCompatibleDC(DC);
SelectObject(memDC,bitmap1);
BitBlt(DC,x.y,cx,cy, memdc,x1,y1,SRCCOPY);
The syntax for the CreateCompatibleDC function is
HDC CreateCompatibleDC(HDC hdc);
Where hdc is a handle to an existing DC. If this handle is NULL, the function creates a memory DC compatible with the application’s current screen. If the function succeeds, the return value is the handle to a memory DC. If the function fails, the return value is NULL.
The syntax for this Bitblt() copy function is
BOOL BitBlt(HDC hdc,int x,int y,int cx, int cy,HDC hdcSrc,int x1,int y1,DWORD rop);
where
hdc – handle to the destination device context.
x – The x-coordinate upper-left corner of the destination rectangle.
y – The y-coordinate of the upper-left corner of the destination rectangle.
cx – The width of the source and destination rectangles.
cy – The height, in logical units, of the source and the destination rectangles.
HdcSrc – A handle to the source device context.
x1 – The x-coordinate of the upper-left corner of the source rectangle.
y1 – The y-coordinate of the upper-left corner of the source rectangle.
rop – A raster-operation code. Define how the colour data for the source rectangle will be combined with the destination rectangle. The ‘vanilla’ operating code SRCCOPY will copy the source rectangle directly onto the destination rectangle. For additional raster code information see the link below
Bltbmp returns zero if successful and non-zero otherwise.
When a bitmap is no longer needed it must be destroyed using the DeleteObject() API function.
For further information
https://docs.microsoft.com/en-us/windows/win32/api/wingdi/nf-wingdi-bitblt
Repainting the Screen Using Device Dependent Bitmaps
Using a bitmap to create a copy of the device context offers one solution to the problem of saving the contents of the client area before a repaint request. All screen output is directed to this virtual window and each time a repaint is received, the contents of the virtual window are then copied to the screen’s device context.
Creating Device-Dependent Bitmaps
The API function CreateCompatibleBitmap() creates a bitmap compatible with the current device context handle. This function is best used for creating colour bitmaps. The prototype of this API function is
HBITMAP CreateCompatibleBitmap (hdc, cx, cy) ;
Where
hdc is a handle to a device context
cx is the bitmap width, in pixels
cy is the bitmap height, in pixels.
If the function succeeds, the return value is a handle to the compatible bitmap (DDB). If the function fails, the return value is NULL.
In addition, a Windows application can also create a device-dependent bit using the CreateBitmap API function. This function is best used for creating monochrome bitmaps. The syntax for this function is
HBITMAP CreateBitmap(int nWidth,int nHeight,UINT nPlanes,UINT nBitCount,const VOID *lpBits);
where
nWidth – The bitmap width, in pixels.
nHeight – The bitmap height, in pixels.
nPlanes – The number of colour planes used by the device.
nBitCount – The number of bits required to identify the colour of a single pixel.
lpBits – Set the colours in a rectangle of pixels.
If the function succeeds, the return value is a handle to a bitmap. If the function fails, the return value is NULL.
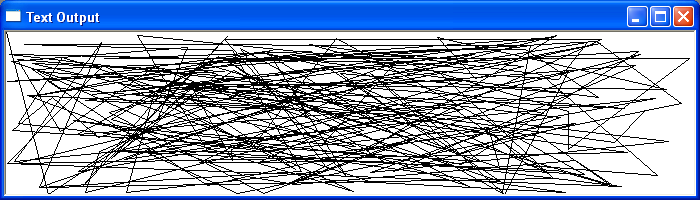
Example
In the code section below, Windows creates a device context of the application window and a compatible device context. The application then creates and fills this virtual copy with 200 random lines. Each time a repaint request is received, the contents of the virtual window are copied to the screen device context by the BitBlt function.
Copying a Bitmap Using the StretchBlt Function
The StretchBlt() function copies a bitmap from a source rectangle into a destination rectangle, stretching or compressing the bitmap to fit the dimensions of the destination rectangle. In the code section below Windows creates a bitmap of the existing screen display and then copies it to the application window using StretchBlt API function. Clicking the left mouse button anywhere with the client Window will initiate the screen copy action.
Example
In the code section below Windows creates a bitmap of the existing screen display and then copies it to the application window using StretchBlt API function. Clicking the left mouse button anywhere with the client Window will initiate the screen copy action.