Windows supports two types of bitmap: device-independent (DIB) and device-dependent.(DDB). A device-independent bitmap is an external format, which allows bitmaps to be moved from one device to another. Device-dependent bitmaps are designed and optimised for use with a specific device (device-dependent) and hence are unsuitable for use in an environment for which they were not created. A typical example would be a bitmap created for video memory which is specialised for displaying screen output.
The CBitmap class encapsulates a GDI bitmap and provides member functions to manipulate the bitmap. A GDI is a device-dependent bitmap that is compatible with the specified device context. Although there is an MFC class for GDI bitmaps, there is no MFC class for DIBs.
To use a bitmap first, create a bitmap object and then load the bitmap into the object using the CBitMap member function LoadBitmap(). The prototype for the function is
BOOL LoadBitmap(LPCTSTR lpszResourceName);

BOOL LoadBitmap(UINT nIDResource);
Where
lpszResourceName – contains the name of the bitmap resource.
nIDResource – Specifies the resource ID number of the bitmap resource.
Return – Nonzero if successful; otherwise 0.
In order to display a bitmap, first two device contexts must be declared: one will hold the current device context while the other will create a second copy device context that will be used to store the bitmap until it is ready to be drawn in the window. This copy device context is created using the CDC member function CreateCompatiableDC(). A newly created or existing bitmap can then be selected into the copy device context using the SelectObject() member function and finally copied to the screen using the device context member function BitBlt(). The sequence of events is summerised as follows.
CClientDC DC(this) //creates device context

CDC memDC//creates copy device context

memDC.SelectObject(&bmp)//load bitmap into member device context

DC.BitBlt(x,y,sz,sy,&memDC,0,0,SRCCOPY);//copies the memory device context, size sx and sy to the screen location specified in x and y.
GDI Bitmaps can be used to create a virtual window and store a copy of the screen contents. This is a useful way to repaint the screen quickly and easily. Output is not written directly to the screen but to the virtual windows. Each time a repaint request is received, the contents of the virtual windows are then copied back to the main screen. To implement this approach a memory device context compatible with the current device context is created and all screen output is directed to it. Each time a repaint request is received, the contents of the virtual windows are then copied back to the main screen.
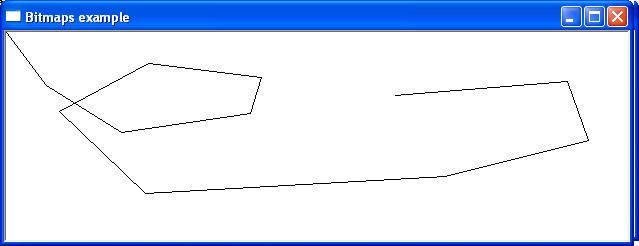
The following example creates a simple graphic drawing program, which draws a line to the mouse click position from the previous cursor position. All screen output is directed to the virtual device context stored in memory and then copied to the screen when a repaint message is sent. The screen can then be redisplayed without keeping a record of each point
#include <afxwin.h>

class CSimpleApp : public CWinApp

{

public:

BOOL InitInstance();

};


class CMainFrame : public CFrameWnd

{

public:

CMainFrame();

afx_msg void OnLButtonDown( UINT, CPoint );

afx_msg void OnLButtonUp( UINT, CPoint );

afx_msg void OnPaint();

DECLARE_MESSAGE_MAP()

int x,y;

int sx,sy;

CDC memdc;//declared memory device context

int maxX,maxY;//used to hold the size of the screen

CBitmap mbitmap;//creates bitmap object

CBrush mbrush;//creates cbrush object

};


BOOL CSimpleApp::InitInstance(){

m_pMainWnd = new CMainFrame();

m_pMainWnd->ShowWindow(m_nCmdShow);

return TRUE;

}


CMainFrame::CMainFrame()

{

Create(NULL, "Bitmaps example");

sx=0;

sy=0;

//get size of screen

maxX=GetSystemMetrics(SM_CXSCREEN);

maxY=GetSystemMetrics(SM_CYSCREEN);

CClientDC dc(this);//get current device context

memdc.CreateCompatibleDC(&dc);//create memory device context

mbitmap.CreateCompatibleBitmap(&dc,maxX,maxY);//create bitmap compatible with screen

memdc.SelectObject(&mbitmap);//select screen bitmap into virtual screen device context

mbrush.CreateSolidBrush(RGB(255,255,255));//create brush for virtual screen background

memdc.SelectObject(&mbrush);//select brush into virtual screen device content

memdc.PatBlt(0,0,maxX,maxY,PATCOPY);//copy bitpattern on device using current brush

}

BEGIN_MESSAGE_MAP(CMainFrame,CFrameWnd)

ON_WM_LBUTTONDOWN()

ON_WM_LBUTTONUP()

ON_WM_PAINT()

END_MESSAGE_MAP()

CSimpleApp MFCApp1;


afx_msg void CMainFrame::OnLButtonDown(UINT flags,CPoint pt)

{

x=pt.x;

y=pt.y;

}


//draw line to virtual device context and invalidates windows sending WM_PAINT message

afx_msg void CMainFrame::OnLButtonUp(UINT flags,CPoint pt)

{

sx=pt.x;

sy=pt.y;

memdc.LineTo(pt.x,pt.y);

memdc.MoveTo(pt.x,pt.y);

Invalidate();

}


//dope virtual screen to physical screen

afx_msg void CMainFrame::OnPaint()

{

CPaintDC dc(this);

dc.BitBlt(0,0,maxX,maxY,&memdc,0,0,SRCCOPY);

}
Last Updated: 16 October 2022